Contact Points
A contact point answers one question: who gets told, and how? Set one up once - email, Slack, PagerDuty, webhook - and any alert you send to it lands in the right place. Each contact point contains one or more integrations and can be assigned directly to an alert rule or routed via a notification policy.
Navigate to Alerting > Notifications and open the Contact Points tab to view and manage your contact points.
Contact points vs OpsPilot integrations
Contact points are used only for sending outbound alert notifications. They are distinct from OpsPilot integrations, which let OpsPilot read information inbound from third-party sources for investigation and analysis.
The contact points list
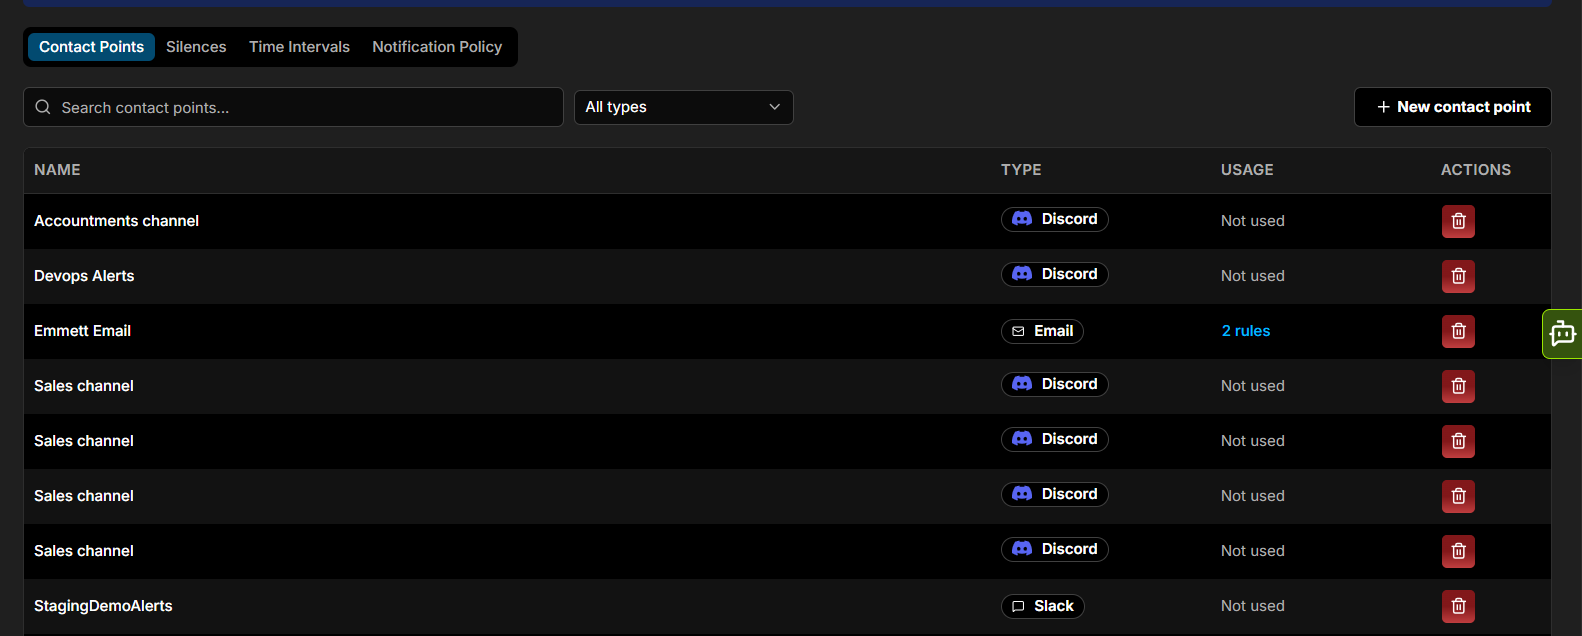
The list shows all configured contact points with four columns:
| Column | Description |
|---|---|
| Name | The contact point name |
| Type | The integration type (Email, Slack, Webhook, etc.) |
| Usage | How many alert rules use the contact point (for example, 2 rules), or Not used. Click the count to see them |
| Actions | Delete (bin) the contact point. To edit it, click its name in the list |
Use Search contact points to find one by name. Use the type filter dropdown to show only contact points of a specific type.
Supported types
| Type | Description |
|---|---|
| Slack | Post notifications to a Slack channel |
| Discord | Post notifications to a Discord channel |
| Microsoft Teams | Send notifications to a Teams channel |
| Telegram | Send notifications via Telegram |
| Google Chat | Post notifications to Google Chat |
| PagerDuty | Create incidents in PagerDuty |
| Jira Service Management | Raise issues in Jira Service Management |
| Pushover | Send push notifications via Pushover |
| Webhook | POST a JSON payload to any URL |
| Send notifications by email | |
| Kafka REST Proxy | Publish notifications to a Kafka topic |
Moving from OpsGenie
OpsGenie is no longer offered as a contact point type, following Atlassian's decision to retire the product. If you previously sent notifications to OpsGenie, use Jira Service Management instead. Atlassian's OpsGenie migration guide covers moving your on-call setup across.
Adding a contact point
You can also add one while creating a rule
Contact points are not only made here. In the rule editor, Then notify lets you search your existing contact points, or click Create new contact point to make one without leaving the rule. See Rules.
A third route is the Wizard on the Status page. Choosing Contact Point asks How should notifications be delivered? and offers the notification channels as a grid of cards. Picking one takes you into its configuration. As elsewhere in the wizard, Skip to form leaves for the full form, Ask OpsPilot suggests a channel, ← goes back and ✕ closes without creating anything.
- Click + New contact point to open the integration picker
- Select an integration type from the grid. Use the category tabs to filter - each shows how many types it holds:
| Category | Integrations |
|---|---|
| Chat | Slack, Discord, Microsoft Teams, Telegram, Google Chat |
| On-call | PagerDuty, Jira Service Management, Pushover |
| Webhook | Webhook |
| Other | Email, Kafka REST Proxy |
- Fill in the required fields for the integration (such as, recipient addresses for Email, or a webhook URL for Slack)
- Enter a unique, descriptive Name for the contact point
- Click Save contact point
Note
Credentials (webhook URLs, API keys) are encrypted at rest and never shown in the UI after saving.
Adding multiple destinations
A single contact point can send to multiple places at once (such as, Email and Slack simultaneously):
- While creating or editing a contact point, click + Add contact point integration
- Select a new integration type and fill in the required details
- Click Save contact point
Editing a contact point
To change an existing contact point:
- Find it in the contact points list and click its name to open it
- Update any integration fields, rename the contact point, or add and remove destinations with + Add contact point integration
- Click Save contact point
Changes take effect immediately and apply everywhere the contact point is used - across every alert rule and notification policy referencing it.
Note
A contact point that is in use (shown in the Usage column) cannot be deleted until it is removed from all notification policies and alert rules that reference it.
Notification templates
Templates let you define reusable message formats instead of writing custom messages for every alert rule. See Notification templates for full details.
Learn more